


Follow @solverworld Tweet this
Computer GPUs lit up
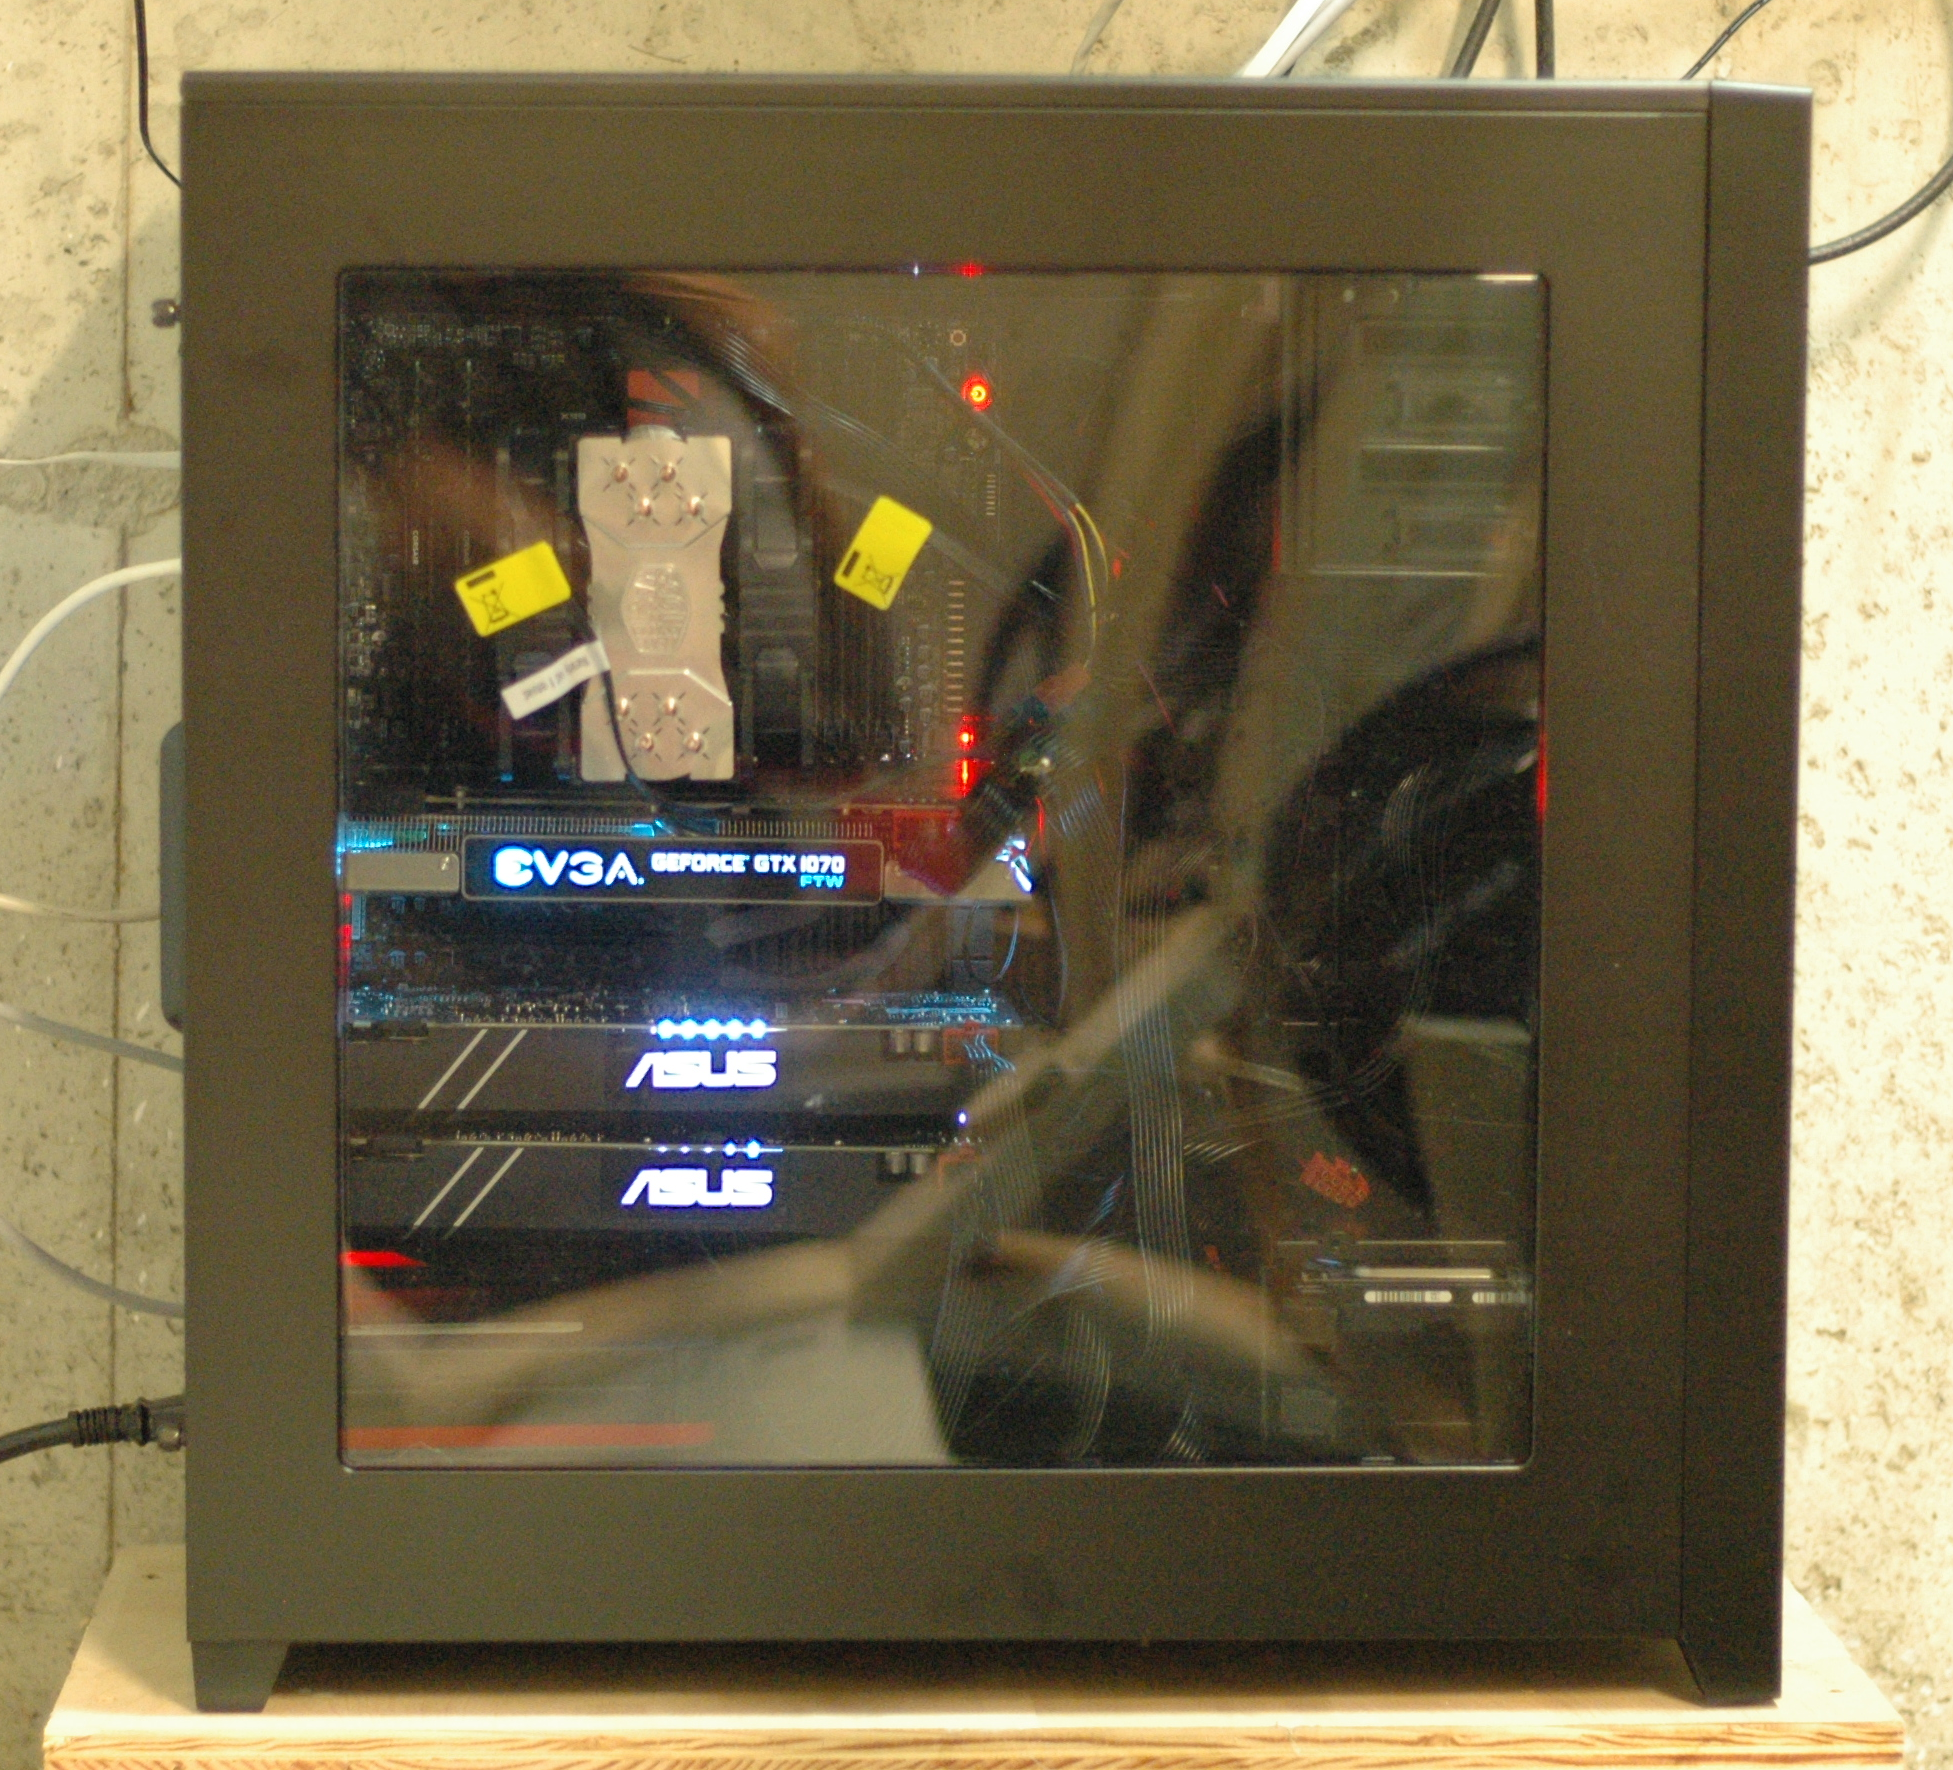
Already built a multi-GPU computer? No? See How to Build a Multi-GPU Computer here.
OK, we have our multiple GPU system wired up and it seems to boot OK into the BIOS. The BIOS shows our 3 GPUs installed in the proper slots and we like the speeds (Gen 3) of PCIe that are chosen.
Let’s install Linux. I choose Debian – I am familiar with it, and more importantly, I got it to work with BOINC. Here is that procedure:
- Create a netinst DVD or CD for Debian Stretch. I found that the latest stable version (Jessie) did not have the correct packages to get BOINC running. I used RC2, but RC3 is available now, and should work as well. Ddownload the .iso file you need (probably the amd64 package) to your computer, then use an ISO writing program to write that to a DVD/CD. On a Windows machine, I used ImgBurn, but you can use any program you like.
- Boot the multi-GPU computer with this DVD. If it does not boot from the DVD drive, you will need to go into the BIOS and set up the boot order so that the DVD is first or at least tried after the HDD fails.
- Follow the prompts to install Debian. There are plenty of guides on the Internet to help you, but it is pretty straightforward. You can take defaults for just about everything. I did NOT install the desktop environment because I only plan on ssh’ing into the computer and did not want to have X software installed/running. Do choose ssh server and standard system utilities. NOTE: you will need an Internet connection, preferably hardwired, to install Debian, so plug in an Ethernet cable to your Internet connection before you start.
- Install sudo so you can become root as needed – first log in as root, then
apt-get install sudo
usermod -aG sudo <your-user-name>
- Add contrib and non-free to your /etc/apt/sources.lst file as some of the nvidia driver files are in those categories. You should have a line in the sources.lst file that looks like:
deb http://ftp.us.debian.org/debian/ stretch main non-free contrib
- Update your database:
sudo apt-get update
- To be able to ssh into this machine without a password, add your public key which you have copied to this machine already, to the list of authorized keys. Note that you could transfer the key with a USB key if you don’t want to copy over the network:
sudo mount /dev/sdb1 /media/usb    # your devices may differ
cat /media/usb/id_rsa.pub >> ~/.ssh/authorized_keys
- Now install the BOINC software and related drivers. You might want to install them sequentially to make debugging simpler in case something goes wrong. I got nvidia-driver version 375.26-2.
sudo apt-get install nvidia-driver boinc-client-opencl boinc-client-nvidia-cuda boinc
- Make sure the BOINC client autostarts on boot up – check your /etc/init.d/ directory for a boinc-client script. Now, a small adjustment is necessary to make sure the GPUs are detected at startup – there is a race condition with drivers, so edit the boinc-client script (as root) and add a sleep 2.0 line so that the start() function in the file looks like:
start() { log_begin_msg "Starting $DESC: $NAME me" sleep 2.0 #<== ADD THIS LINE if is_running; then log_progress_msg "already running" else if - Now, you should be able to reboot the computer and see something like the following from ps -ef:
#ps -ef |grep boinc
dan      614 24444 0 17:17 pts/0 00:00:00 grep boinc
boinc    623 1     0 Mar30 ?     00:00:00 /bin/sh -c /usr/bin/boinc --dir /var/lib/boinc-client >/var/log/boinc.log 2>/var/log/boincerr.log
boinc    641 623   0 Mar30 ?     00:30:05 /usr/bin/boinc --dir /var/lib/boinc-client
If you can’t see boinc, running you will need to do some debugging. Check out /var/log/boinc.log and you can see the startup messages. If everything is going well, you will see the GPUs being detected and indicating how many are usable (hopefully the number you installed, in this case 3). Some debug steps are: (i) try nvidia-smi to see if the Nvidia drivers can see your GPUs, and (ii) set the BOINC logging flags – possibly <coproc_debug> in BOINC Configuration.
- A couple more things and we are almost done. To enable remote management of the BOINC server software, add/edit the following files in /var/lib/boinc_client:
echo <remote-access-password> > gui_rpc_auth.cfg
echo <your-remote-access-IP-address> > remote_hosts.cfg
- Now you should be able to connect to the server through the boincmgr program, using the password you set above. You can install BOINC on a windows or linux machine fairly easily, which will give you access to the manager program. Of course, if you want to keep your GPU machine in a place where you can access it via keyboard and monitor, you could just run the boincmgr locally. Note that it will not run unless you install a Desktop environment, since it needs X-client running.
- From the manager program, you can select a project from the available ones on BOINC such as SETI, primegrid, etc. You will have to provided credentials to get you started, which you get by creating an account on the appropriate projects website (e.g. primegrid.com). For Primegrid, you can control which tasks your computer works on through configuring things on the primegrid website. Note that only certain tasks can take advantage of the Nvidia-cuda GPUs, so make sure you select at least 1 subproject that does that. Other tasks can be run on the CPU directly, but make sure not to fully load your CPU with tasks, as that will tend to slow down the servicing of the GPUs.
- If your computer will have any exposure to the outside world (including your home WiFi), you should be careful to secure it properly. At a minimum, you will want to disable root logins, all unnecessary processes and open ports.
- Join the SolverWorld team on PrimeGrid and add your computing power to the team. I will announce your contributions (if you want) on separate page in the future.
- Happy computing!
would adding gpus affect the speed of the gpus? for example, 1 gpu can do 10 work units. when you have 6 gpus, will the computer be able to provide 60 work units at the same amount of time? assuming u have 16 cpu cores on one system which would be more than enough cores for the 6 gpus and all the work and gpu are the same.
I am trying to find out if adding more gpu on one computer effectively slow down the processing of the gpus. Thanks.
The GPUs will not themselves be slowed down by the addition of additional GPUs, however, the bandwidth to load data onto the GPUs is limited – this is determined by how many lanes of PCI your particular CPU has. The particular project you are running will determine the number of lanes needed to keep pace with the GPU card. As far as the number of CPU cores, that is not directly relevant. You could tell by looking at your CPU utilization with 1 GPU installed. If it is below 10%, then you would be able to run, say, 6 GPUs.